Friday, July 8, 2011

Dollar Tree Finds and Measurement Idea

Well I had been home for six straight days!  I went for a walk down to the river twice and drove to the post office but that was it.  Mostly I have just been painting the house and working on the computer.  I told my husband I was going to go crazy if I didn’t get out of the house.  So.... I was incredibly spontaneous and. Drumroll please.. I went into town and had my oil changed (gasp) AND went browsing at Dollar Tree.  This is what I found.

 These fabulous ocean creatures grow to be 600% bigger then their original size.  Soo..... I am planning on using them in a math measurement station.  First, my students can measure the length of each ocean creature.  Then we can put them in water.  Each day they can measure them and record their observations.  When they are finished expanding we can calculate how much they actually grew!  Sounds like fun to me :)


This one is my fave!  I swam with sea turtles on our honeymoon in Maui!

I also found these little pillows that will be added to the safe place in my room.  It is a requirement at my school that each classroom have a designated safe place.  It is a place where students can go when they need a break if they are feeling emotionally overwhelmed or stressed.  I like to teach my students meditation strategies that they can use while they are in the safe place so that they can come back to work.  Also so that they have those skills for the rest of their lives!


 Aren't they the cutest meditation pillows?

And last but NOT least..... I found THESE!!  I had spotted them in someone elses blog and buckled in the knees when with my good fortune they had them here at my small town Dollar Tree!!

I am going to sort my fake money for whole group instruction as well as for math station work!

Whew, I'm glad I got out of the house!  We even had visitors tonight.  Our good friends are here from Las Vegas with their precious six week old baby! 

Wednesday, July 6, 2011

Inspired and uplifted through Yoga

I'm back!  I've been in beautiful New Mexico for the month of June.  Every summer my hubby and I as well as 2,000+ other amazing souls from over 40 different countries go to New Mexico to attend 3HO's Summer Solstice Yoga Festival.  I've learned a lot from attending these festivals and made some really great connections with people from all over the world. 


This year I have been particularly inspired by this incredible book:

(Click on the book for a link to purchase it.)

I'm inspired through this book because as a part of my Masters program I need to work with secondary students and this is the perfect curriculum!  I will be working with the high school students teaching them yoga, meditation and art!  This is a fabulous book and even has a chapter to do Yoga and Art with children!  

Last school year I used Yoga a lot and it was my saving grace!  One of the techniques that came in very handy I learned from a mentor of mine Shakta Kaur Khalsa.  She is the author of several books including

 (click on the picture for a link to purchase the book)

I had several students that have a difficult time managing their emotions appropriately and would have violent outbursts.  This little trick helped one student in particular go from having meltdowns several times a week that would last for several hours to a meltdown once or twice a month and with this breathing technique they could calm down in five minutes or less.

How to teach Feather Breathing:

First, gather craft feathers with stiff top feathers and soft fluffy bottom feathers.

Next, show students how to hold the feather in both hands five or six inches away from their mouth.
Demonstrate how to blow on the bottom fluffy feathers while thinking the word calm.  Continue breathing long, slow and deep allowing the belly to expand on the inhale and squeezing all the air out on the exhale. 

Tip: If a student is so upset that they won’t hold onto the feather, let them calm down a little bit and then just start tickling their face, neck and arms until they are calm enough to grab the feather.

You can also use the feather to help students wake up!  To do this have the students blow on the top stiff feathers quick and strong.  Have them inhale deeply to end.  They can meditate on the word energized while they breathe.


..Check out the guest blog I wrote for What The Teacher Wants about children's yoga HERE...


I leave you with a picture of some of the Utah attendees from last years Solstice.  :) 

Oh ya, when we got home at one o'clock in the morning we arrived to a flooded house due to a broken kitchen pipe :(  So for the last week my hubby and I have been doing a complete kitchen renovation!  Our refrigerator was sunk into the floor! 

Thanks for stopping by!  I've had a blast getting all caught up on the fabulous teaching blogs!  I can't believe how fast this summer is going by!  

Let me know if you have any questions about teaching yoga in your classroom, I'd love to help!!


Sunday, April 24, 2011

Life Cycle of A Frog

Wahoo!!  I have been on spring break since Friday and I don't have to go back to school until the 2nd of May!!  


Anyway, I am sure you're starting to catch a pattern in my posts.  Can you tell I LOVE science, project based learning and nature???  I promise it's not all I teach, just my favorite to blog about right now.  Our math curriculum is Saxon and reading is Houghton Mifflin and even though I add fun extra ideas to those lessons, science is where I really get to be creative in my teaching.  

Part of second grade core in Utah is life cycles. I know the life cycle of a frog is very popular to teach. Since I already have several animals that I take care of and was not willing to take on another this is what I did.  

I bought these cute little life cycle sets from Oriental Trading.  You get the frog and the butterfly set for only $5.99.  Click here to order them.        


Then as a class we read this book.  I put it up on the projector with my Elmo document camera and we read it together as a class.  Click on the picture to order it from Amazon.  


Then as a class we made an extra desk in our class look like a pond.  We used paper, some fabric that looks like water, rubber frogs, fake flowers, and a plastic bowl.  This was the first day. My students kept adding to it for the next couple of weeks.  They really loved creating this habitat.


So then over the next week and a half to two weeks I switch out the life cycle pieces so the students can see it change. The life cycle set from Oriental Trading doesn't come with a frog egg so I just use a marble.  It's a lot bigger then an actual frog egg but it's what I had laying on my desk.   They loved it and can you believe it Mrs. Matsuda had no idea that they were switched.  They were actually growing and changing.  I was just as surprised as they were!!!  ;)


There you have it folks.  Our adult frog.  He has come out of the water.  My kiddos were so surprised when they came back from lunch one day to find the pond empty and an adult frog on the edge of the water.  


Is this something you might try in your classroom?  What other fun activities do you do with the frog life cycle?  

Tuesday, April 19, 2011

Earth Day Bulletin Board Idea Featuring The Lorax!

Happy Earth Day week everyone!  Here is a bulletin board idea. Read The Lorax by Dr. Seuss.  Talk about all the mistakes the Once-Ler made and how it effected the environment.  

*This is a great story to show cause and effect.

I used blue butcher paper for the sky, green for the rolling hills.  I used brown butcher paper for the trunks and red, purple and orange for the tufts of the truffula trees.  In each truffula tree I put a tip on how to be green.  

You can download the green tips for free here.


Then I made the Lorax out of construction paper.

We talked about the three r's.  Reduce, reuse and recycle!  We listed examples of each "r".  Then we used Rachelle's Lorax worksheet from whattheteacherwants.blogspot.com here is the link for the earth day unit that has the Lorax writing sheet.  Thanks Rachelle!


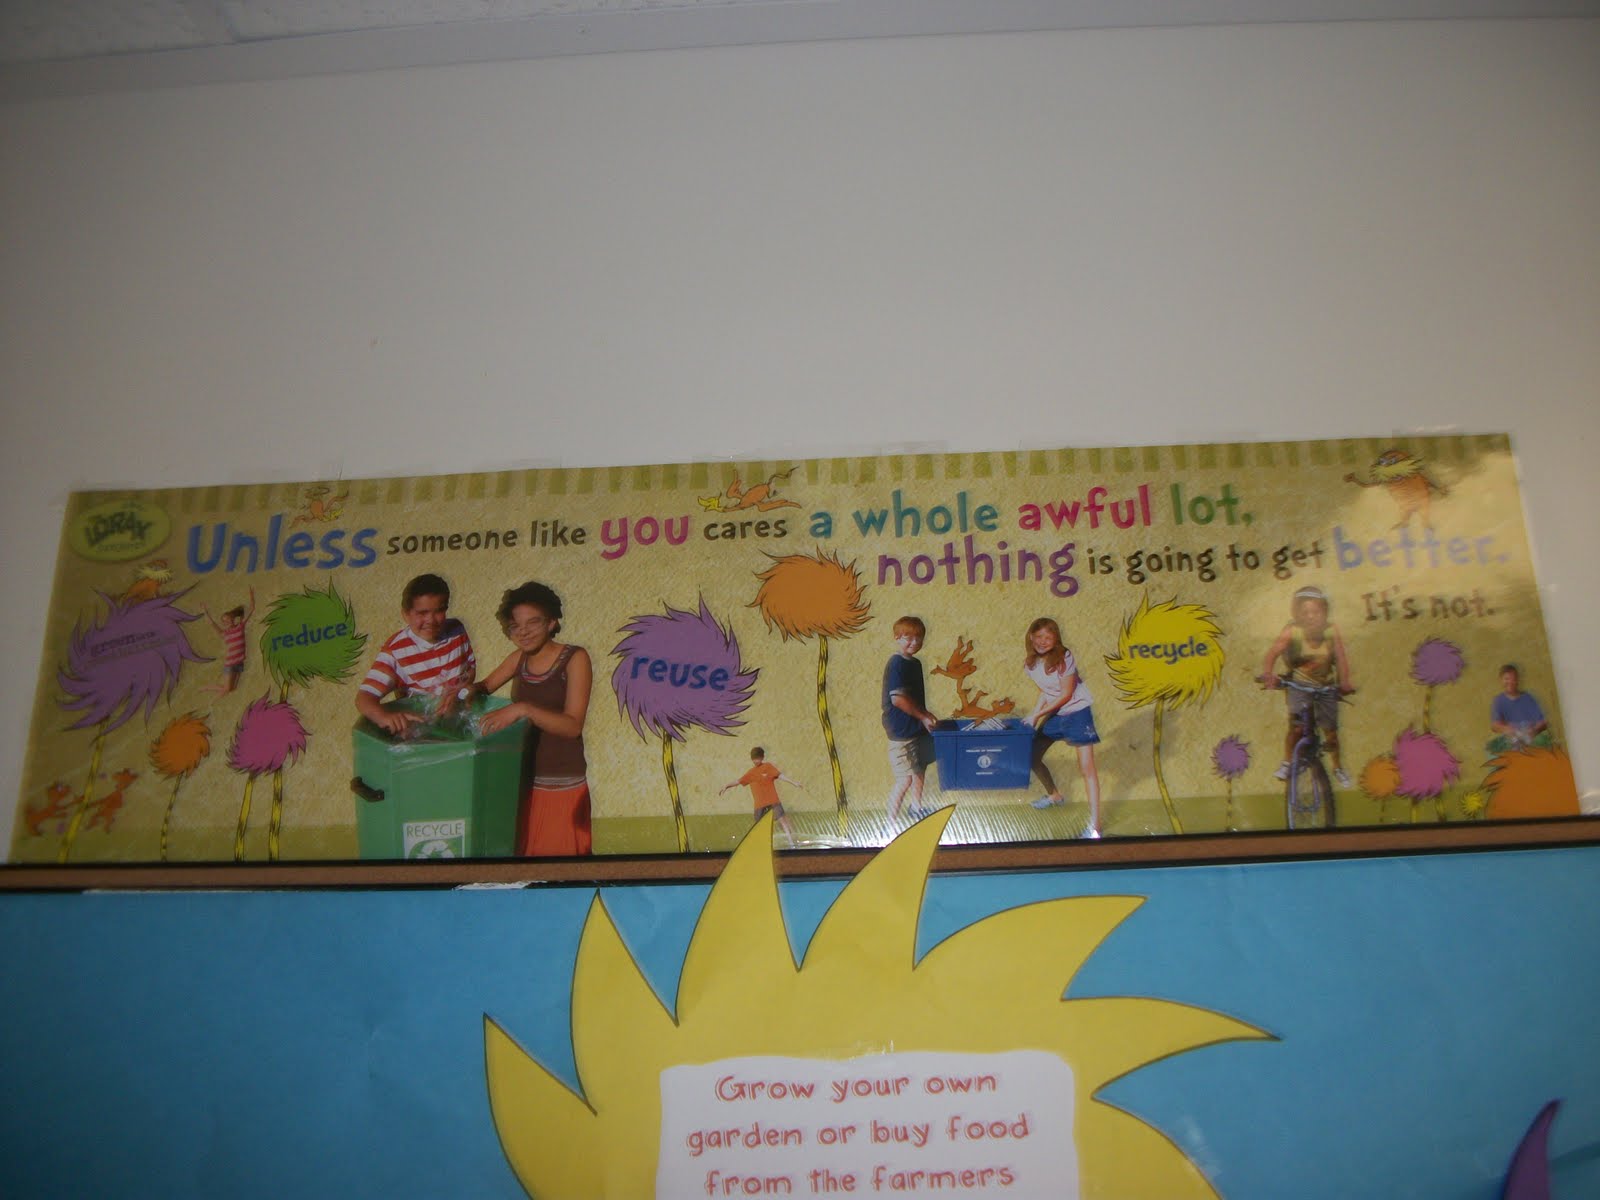
At the top of the display I have a poster that I bought from smilemakers.com last year.  


You can make your own banner though.  It has the famous quote from The Lorax:

"Unless someone like you cares a whole awful lot, nothing is going to get better it's not!"

On Friday I am going to give each student a walnut.  I will tell them that it is a truffula tree seed.  (In the end of the Lorax the Once-Ler gives the little boy the last truffula tree seed.) The walnut will symbolize their dedication to being green.


Wednesday, April 6, 2011

Rain Forest

Wow, the last few weeks have been CRAZY BUSY!!!  Here are some pictures of the "rainforest" we created in our classroom.  We watched this brainpopjr.com video...


We also love this book.  Click here to order it.


...and then made this rain forest complete with rubber frogs, ants and flies:


Can you see the flies dangling in the air?  I hot glued fishing line to the wings and then tied them to the branches.  It's just the perfect touch!


Then my students filled out this writing extension that I made and want to share with you!  Just let me know if you download it :)


Monday, March 21, 2011

Class Pets Venn Diagram

This week for our comprehension skill we are reviewing how to compare and contrast. On Mondays and Thursdays we have Reading Lab which is an intervention that we have put in place for our struggling readers.  During that time block, I keep my students that don't need reading interventions and I do extension activities with them.  This is what we did today.  

Meet our class guinea pigs!!  Their names are Spike and Rose.  This is the second year that I've had them and my students just LOVE them!  They take turns feeding and watering them with our jobs chart (I'll post later). 


I have their cage in a plastic storage bin which completely gets rid of the mess factor!


I printed little guinea pigs and gave them to my students.  They wrote adjectives about our piggies and then we posted them on our venn diagram door.  


Do you have class pets?  How do you incorporate them into the curriculum?

Thursday, March 17, 2011

Cute Recycled "Buckets"

I wanted to share this idea that I have for cute CHEEP and GREEN containers/buckets.  So far I have used these little babies for Valentines Day and for my "bucket filling system" (an idea I got from Rachelle!).  They are super easy and SOOO cute, plus my students LOVE making them!!!

First of all I have to thank our fabulous lunch lady extraordinaire Teddi.  She saved and rinsed the big cans from peaches and pears from the kids lunches.  

We turned them into these:


Also, I have to give my fabulous husband a shout out because he has been saving dog food cans for the past year and half.  If I let him he would save everything, he is just that resourceful!!  He was saving them to recycle but our cute little town is not equipped with a recycling service that takes tin as of yet, sad I know!! 

We turned them into these: 


So are you dying to know how to make them yet???


You will need:

~ Cans the size you want them
                                                     ~White duct tape
                                                     ~Paper
                                                     ~Super cute ribbon of your choice
                                                     ~Hot glue gun
                                                     ~Paint

Clean the cans and remove any label.        

Cover the opening edges with white duct tape (I got mine at Wal-Mart in the painting section).

Hot glue the ribbon near the edges.  
 Cut paper to the size of the can and glue with the hot glue gun.  
Then let students decorate. 

Is this something you'll use in your classroom?  What other ways can you think to use them?