Showing posts with label art. Show all posts

Monday, September 10, 2012

One Million Bones

Today our students had an amazing opportunity to be a apart of an impactful social arts project to bring awareness of and to raise funds for the victims of genocide.  Your students can too!  In the spring of 2013, the project will culminate in Washington D.C. where 1,000,000 handmade bones will be placed on the National Mall as a reminder of the millions displaced and sufering from historic and on-going genocides and mass atrocities, particularly those happening today in Burma, Sudan and the Democratic Republic of Congo.  

 Now, I know genocide is a very intense and heavy subject and that it can be very uncomfortable and scary to talk about with small children.  Yet, when approached with great care, it can also be a very real way to emphasize the importance of tolerance, respect, appreciation and cooperation.  I strongly urge you to visit the website and join this powerful movement.    


                       As you engage with the One Million Bones project, you and your students 
                       will become a part of a larger community of artists, activists and students 
                       from around the United States and the world. Emphasizing the ways that 
                       art can build bridges between people, connect us to each other, and 
                       provide individuals with the ability to turn creative impulse into social 
                       impact stands as a core belief of art activism and this project.


If you aren't sure how to approach the subject with your students the website has some fantastic resources with complete cross-curricular lesson plans.  They are differentiated and available for classes k-12.


{click the picture to take you to this page.}

Our students had a great time creating their bones for the installment and are so excited that the bones will be traveling all the way to our nations capital.  We are studying body systems right now so it was perfect to have a life size skeleton visit the school for our students to see.


The volunteers came from the organization to talk to the students about tolerance.  Their message was that underneath it all we are all the same.  No matter what we look like, where we live, the clothes we wear, the languages we speak, our religion or interests we are all the same.  They told our students that the reason for this project is to promote peace and acceptance and that it's not right to suppress or kill people because of their differences.  I think this message is quite fitting considering the New Mexico state flag proudly waves the Zia symbol, which represents friendship among united cultures.  


They were so proud of their sculpted bones.


As the volunteers left and carried away the skeleton I couldn't help but feel this eerie presence of the real importance and meaning for this project.  The fact that  people are dying every day in genocide is unfathomable in this time and space.  I feel so proud and grateful that the bones we created today will help to bring aide to some of the suffering.  We must always remember to teach our children love and respect for everyone and the best way is through example.  

I hope you are inspired to take part in this beautiful and powerful art installment!  What a great way to help make a difference!      

Tuesday, March 13, 2012

Cherry Blossom Math Art Project

Out here in Utah we have been patiently waiting for spring and it is just a few days away now!  The spring equinox is on March 20th!  We have been talking a lot about our trip around the sun and we are excited to meet this milestone!  


I showed my students a few pictures of cherry blossom trees that I found through google.  This one is from centralpark.com


I also showed them the oriental style of painting cherry blossom trees and branches.  There are many examples to be found through google.  This one is from: http://www.bloomstersfl.com/CONTACT-.html 


I showed my students how to use a q-tip to make the branches and the flowers.  To make the flowers use the tip like a stamp and make little flowers by clumping together pink circles.  


I work with a fabulous aide, Mrs. Gurule, who also happens to be a very talented artist!


This week my class has been practicing dividing a set of objects in half.  
They had to have equal blossoms on each side of the tree or branches so that they were thinking about dividing a set of objects in half.  

Here is how they turned out.  Didn't they do a great job?!


While my students were painting I played some youtube videos with birds chirping like this one...


Friday, January 6, 2012

Jellyfish Art!

This week the book in our Journey reading program is Jellies, The Life Of Jellyfish by Twig C. George.  This is an excellent informational text with great pictures!  My kiddos loved learning all about jellyfish!  


{click on the picture to get your own copy!}


Fun facts about jellyfish:


* Jellies do not have brains or hearts.
* They can only go up and down.
* Their tentacles sting for protection and to catch food.
*Australian box jellies are more dangerous than a cobra!
*Some even grow their own algae for food.
*The Arctic Lion's Mane jellyfish can grow to be as long as a blue whale!!!


I also made one of these awesome DYI jellyfish.  I used it as a motivational tool during whole group reading.  I moved it from desk to desk while we were reading.  They only get a turn if they are following along and reading together. I am going to have it out so they can play with it when they finish their work early.  


{click the picture to check out this fun moms great blog!}


Here are the steps to make the art project we did today!

Materials needed:


thin see through wax paper sheets
crepe paper
glitter paint
paint brushes
glue sticks
scissors
pencils


Helpful hint:  become good friends with the lunch lady (THANKS TEDDI!) then when she least expects it hit her up for large wax paper sheets like these ones.  ;)  They aren't very waxy at all.  They are more like grease blotting sheets. 


(I couldn't find a picture of the large sheets)


First, fold the wax paper in half, hot dog style.  Then, outline the shape of your jellyfish.  Make sure you start at the top of the fold.  You will need to be able to open them up.  Just like in nature, our class came up with many different styles of jellies.


Next, cut out the jelly body making sure not to cut the fold on the top so you can still open it up.  Carefully cut both sides at the same time so that they line up.  I tell my students to make sure to pinch the paper together so that it doesn't slide around.  Also it helps if they keep the tip of their scissors on their desk while cutting.  The paper needs to stay flat on their desk to do that.  

After cutting it out.  Open up the jelly and glue strips of crepe paper on the bottom for tentacles. 


 If they drape the tentacles over the edge of their desk then everyone has enough room to work create.  


After that pass out paint brushes and paint.  Paint the inside first.  It makes it easier if you paint the side with the crepe paper.  That way, when you fold it back together it's not as messy.  After it's folded back together paint the top.  


If you use the thin wax paper then when you fold it back together you can see the paint from both sides.  I also let them paint to top when it's closed because painting is just so much fun!


Here is the final product!


I'm going to hang them from the ceiling this weekend.  I'll add add a picture once they're up!  I just love how they turned out.  They are going to add some fun color to our room!  


Wednesday, December 7, 2011

Easy Peasy Symmetry

Today I introduced symmetry during math.  First I showed them what symmetry meant using our bodies as an example.  Then we used shapes and we practiced drawing lines of symmetry on them.  We folded them on the lines to double check that they were actually symmetrical.   After that we created these fabulous symmetrical works of art!  


So here is an easy art project that is sure to get oooh's and aaaah's from all of your little darlings.  


First have your students fold construction paper in half hamburger style.  Then go around and ask each child what colors they would like.  I let them choose three colors.  


Next fold the paper back up and spread the paint out by pressing on the paper from the fold to the front opening.  If they spread it from side to side it will spill out the sides and be really messy.  


When they open up their paper they will find a beautiful symmetrical painting will have appeared like magic!  Followed by the oooh's and aaaah's...


Helpful hint:


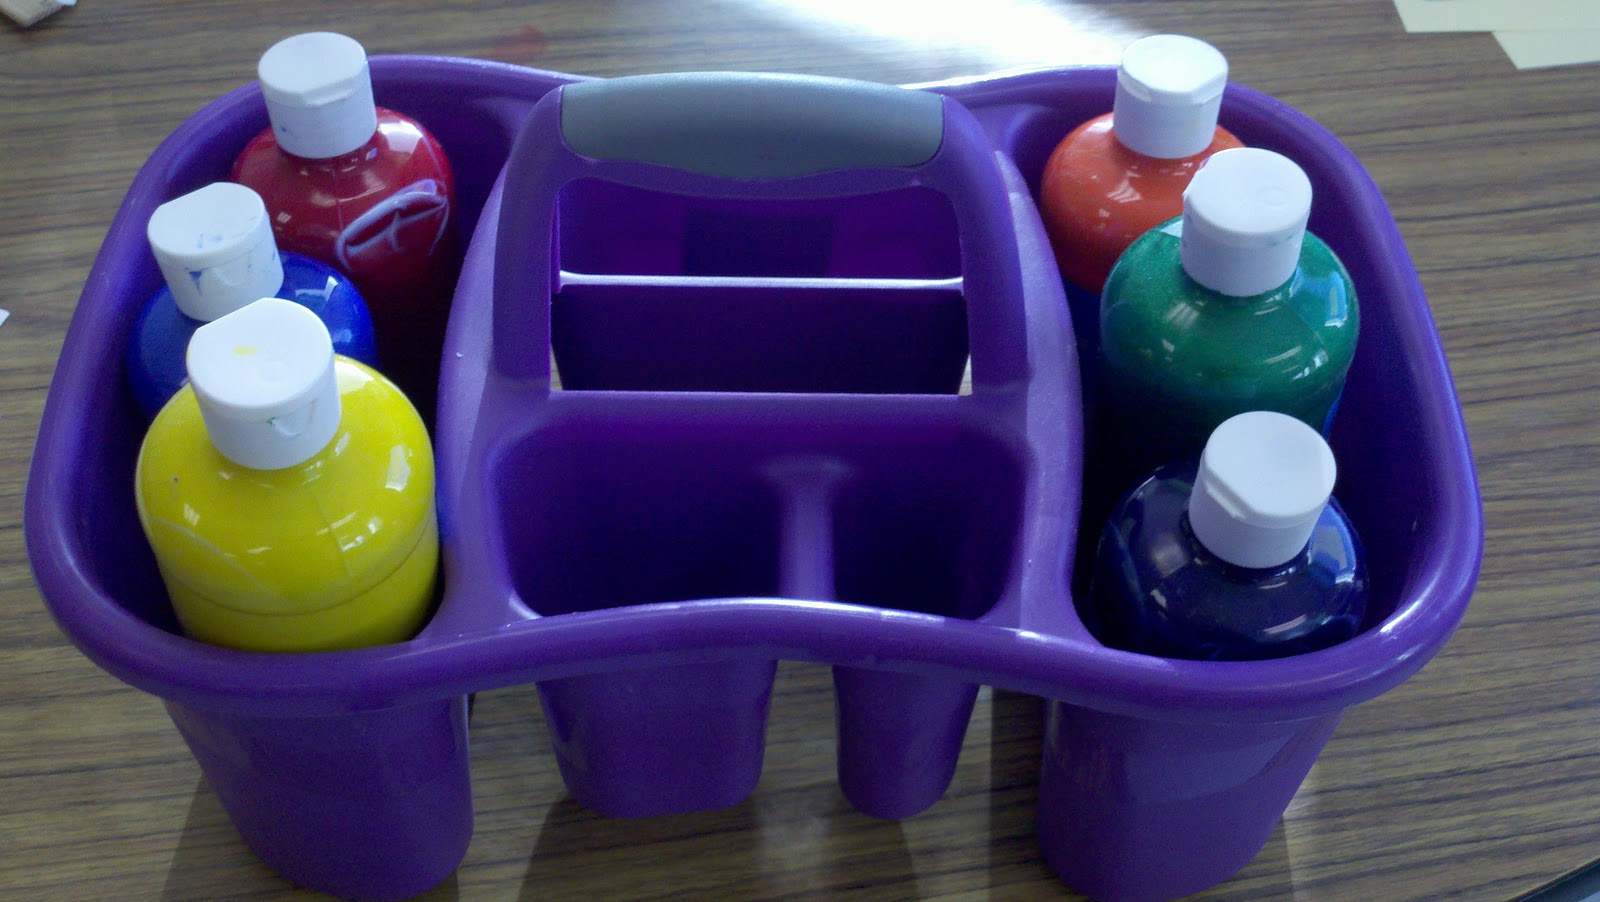
I put the paint in a shower tote so that I can easily carry them from table to table.  


Then I had my students write about their symmetrical paintings in their math journals.  You know how the Common Core loves for our kiddo's to write about math!

They had to answer these two questions in their writing: What does your picture look like?  What does symmetrical mean?  

Here are some student examples....


and 


Wednesday, April 6, 2011

Rain Forest

Wow, the last few weeks have been CRAZY BUSY!!!  Here are some pictures of the "rainforest" we created in our classroom.  We watched this brainpopjr.com video...


We also love this book.  Click here to order it.


...and then made this rain forest complete with rubber frogs, ants and flies:


Can you see the flies dangling in the air?  I hot glued fishing line to the wings and then tied them to the branches.  It's just the perfect touch!


Then my students filled out this writing extension that I made and want to share with you!  Just let me know if you download it :)